
Arcade Machine Pre-Shipment Inspection Checklist for Commercial Buyers
A model-aware framework for checking finished arcade equipment against the approved order before packing and shipment approval.
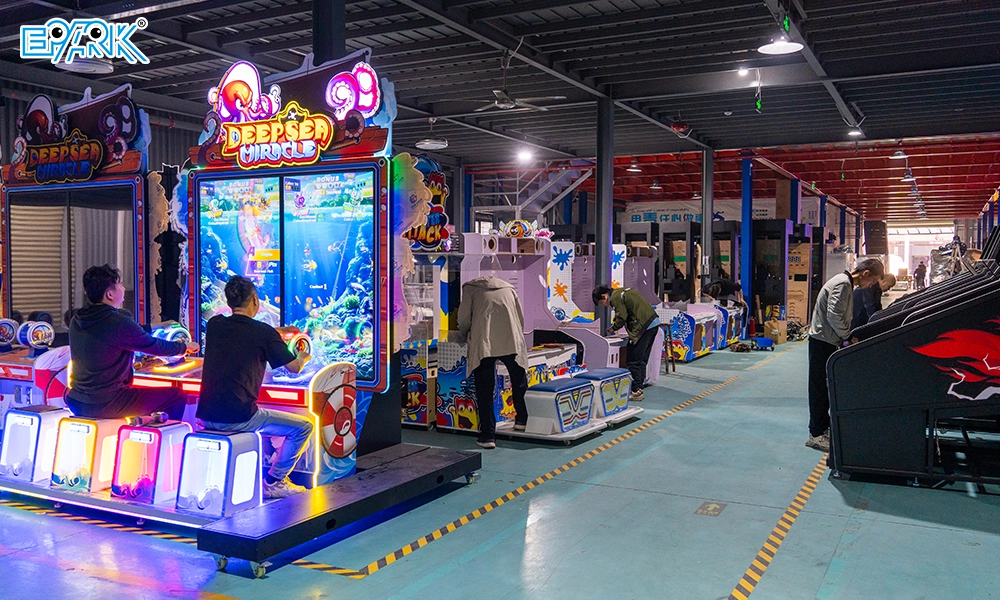
Quick Answer: What Should Be Checked Before an Arcade Machine Ships?
Before shipment, confirm the model and quantity, approved appearance, dimensions and electrical configuration, controls, displays, sound, lighting, game functions, payment interface, model-specific mechanical functions, accessories, spare parts, documents, visible condition, packing identity, and agreed shipping marks. Record each item as pass, issue, not applicable, or pending evidence.
The approved order is the reference. There is no single universal test list or fixed test duration that is appropriate for every racing, shooting, claw, sports, air hockey, redemption, kiddie ride, or VR machine.
1. Build the Inspection Plan Before Production Finishes
Inspection criteria should be agreed while the order is being confirmed, not invented when the machine is already waiting to ship. Begin with a document pack that both buyer and supplier can reference.
The pack may include:
- purchase order and final quotation;
- model list and quantities;
- approved parameter sheets;
- voltage, frequency, and plug requirement;
- payment-system requirement;
- approved artwork, color, logo, or language proof;
- included accessories and purchased spare parts;
- required documents and applicable certificate scope;
- packing and shipping-mark requirements;
- agreed inspection evidence and acceptance contacts.
Give every model or package a consistent identifier. That identifier should appear where practical on the quotation, inspection record, accessory list, and packing record. Mixed orders are much easier to verify when “Item 07” means the same machine in every document.
Define who can approve the result and how exceptions will be handled. If the buyer needs a third-party inspection, allow for access, scheduling, and re-inspection before the shipping window.
2. Confirm Product Identity and Quantity
Start with the simplest question: are these the machines that were ordered?
Check the model reference, category, player capacity, quantity, and approved product appearance. Compare the finished machines with current order documents rather than an old catalog image. If a product has detachable components, record the complete set.
For a mixed FEC order, create a count by model and package. Photograph or video the product identifier and a clear complete-machine view. This evidence makes it easier to link later functional checks and packed packages to the correct item.
Do not treat a similar cabinet color as sufficient identification. Controls, display configuration, seating, payment devices, mechanical assemblies, and accessories may distinguish one configuration from another.
3. Review Cabinet, Structure, and Visible Finish
Perform a systematic external review under adequate lighting. Check visible panels, edges, doors, locks, fasteners, trim, glass or transparent guards, decals, artwork, seating, and accessible service panels as relevant to the model.
Look for:
- damage, cracks, dents, sharp unfinished edges, or loose trim;
- inconsistent alignment of doors, panels, seats, or decorative components;
- missing fasteners, locks, feet, wheels, handles, or covers;
- visible cable pinch points or unsecured components;
- artwork, logo, language, and color against the approved proof;
- labels and identifiers required by the approved order.
The inspection record should distinguish appearance issues from functional issues. Use close-up evidence with an item identifier and location rather than an unreferenced photograph.
4. Verify the Electrical Configuration
Check the electrical information against the approved specification and destination requirement. This may include voltage, frequency, plug or connection method, grounding arrangement, rated power information, switches, fuses, accessible connectors, and cable condition, depending on the machine.
The supplier should demonstrate the finished configuration that will ship. The buyer should still have a qualified local professional verify the venue circuits, connection method, and local requirements before installation. A factory functional test does not certify an unfinished venue.
When the order includes multiple machine types, do not assume they share identical requirements. Record the model-level electrical data and any special installation notes.
5. Test Controls, Displays, Sound, and Lighting
Power the machine according to the supplied operating procedure and allow it to reach its normal ready state. Then check the operator-facing and player-facing functions that apply to the selected model.
Typical checks can include:
- startup and normal game-ready state;
- screen image, touch response, or multi-display behavior;
- buttons, joysticks, steering, pedals, mounted controllers, sensors, or other inputs;
- speakers, volume adjustment, and obvious unwanted noise;
- decorative and status lighting;
- game start, player selection, scoring, round completion, and reset behavior;
- operator menu access and the settings confirmed for the order;
- network or link behavior when linking is included in the approved configuration.
Test the actual player positions. On a multiplayer machine, one working control station does not prove that every station works. Record a short continuous video when it helps show the input, on-screen response, and completion of a test sequence.
Avoid publishing or accepting an arbitrary universal “burn-in” duration. The appropriate factory testing method and duration depend on the model, components, order, and agreed acceptance plan. Document what was actually tested instead of relying on a broad phrase.
6. Test the Payment or Credit Interface
The payment interface is part of the operating configuration, not a decorative accessory. Test the approved method on every relevant model or on the agreed sample basis for identical units.
Depending on the order, confirm:
- correct coin or token acceptance;
- credit value and credit accumulation behavior;
- rejection of an invalid sample where an agreed test is available;
- card-reader mounting, wiring, pulse, or other required interface;
- free-play setting when specified;
- service or test-credit operation;
- ticket or redemption interface only for applicable non-racing products;
- access to the coin box, reader, or service area.
For a third-party cashless system, define which party supplies the reader and who performs final software, network, and account commissioning. A factory can check an agreed interface, but the complete venue system may require on-site work by the payment-system provider.
7. Add Machine-Type-Specific Checks
The generic inspection becomes useful only when it is expanded for the actual equipment.
Racing Arcade Machines
Check each steering input, pedal, seat and adjustment point where applicable, display, sound, game start, player station, and link function included in the selected configuration. EPARK racing machines must not be described or tested as ticket, lottery, redemption, or ticket-payout machines.
Shooting Arcade Machines
Check every mounted or handheld controller, trigger, aiming or calibration behavior, sensor response, player station, screen response, and secure controller mounting according to the model.
Claw Machines
Check control movement, claw travel, prize-area access, doors and locks, lighting, credit behavior, and the model-specific settings agreed for the order. Do not assume that prize size, claw assembly, or operating settings are interchangeable across models.
Basketball, Boxing, and Other Sports Machines
Check the scoring input, balls or striking components, guards, nets, return path, sensors, player-facing structure, and reset behavior that apply to the selected machine. Inspection should include loose or missing components that could affect installation or operation.
Air Hockey and Bowling Arcade Machines
Check the levelable structure, scoring, puck or ball path, returns, player controls, accessible surfaces, and detachable parts as applicable. Confirm how long or separate components will be packed.
VR Simulators and Motion Equipment
Check seating and restraints where supplied, operator controls, content and hardware configuration, display or headset functions, motion behavior, emergency or stop functions provided by the model, and the installation information required for the site. The exact safety and supervision plan must follow the product and local venue requirements.
8. Confirm Accessories, Keys, Manuals, and Spare Parts
Small missing items can delay installation even when the main machine passes inspection. Compare the physical contents with the approved accessory and spare-parts list.
Verify:
- keys and lock mapping;
- power cords or specified connectors;
- balls, pucks, controllers, sensors, seats, or detachable parts supplied with the model;
- tools or setup items expressly included;
- operating or installation information promised for the order;
- purchased spare parts, with names and quantities;
- labels that identify which machine each accessory belongs to.
Photograph grouped accessories before they are sealed. For mixed orders, use separate bags, cartons, or labels so the receiving team can locate the correct components without opening every package.
9. Review Order Documents and Available Compliance Evidence
Before release, compare the product names, quantities, and other confirmed fields across the quotation, commercial invoice, packing list, and shipping instructions. Resolve inconsistencies before the documents are finalized.
If certificates or test documents are required, verify that each document's product, model, standard, market requirement, and validity apply to the selected equipment. EPARK's public certificate materials do not imply universal certification for all products.
The importer should confirm destination requirements with qualified local professionals and relevant authorities. A pre-shipment inspection can verify the documents supplied; it cannot create compliance that is outside the document's actual scope.
10. Inspect Packing and Package Identification
Functional acceptance normally happens before final packing. After approval or corrective work, document the agreed packing process and package identity.
Check as applicable:
- protection of displays, controls, edges, decorative parts, and other vulnerable areas;
- fixation or separate packing of movable and detachable components;
- accessory and spare-parts location;
- external packing condition;
- package count, marks, and item references;
- orientation, handling, or destination labels required by the order;
- package dimensions and gross weight once confirmed;
- packing and loading photos or video included in the agreed evidence plan.
Packing methods vary by machine, order, and route. Do not convert one real packing photograph into a universal promise for every product. The final packing scope should appear in the quotation or order record.
11. Use a Clear Issue and Re-Inspection Log
An inspection is not complete when an issue is mentioned in a chat message. Record:
| Field | What to record |
|---|---|
| Item ID | Model and unit or package reference |
| Requirement | Approved specification or acceptance criterion |
| Finding | Concise description of the observed issue |
| Evidence | Photo or video filename and inspection date |
| Action | Repair, replace, adjust, clarify, or accept by agreement |
| Owner | Supplier, buyer, system provider, or other responsible party |
| Status | Open, corrected, accepted exception, or pending |
| Re-check evidence | Proof that the action was completed |
Approve shipment only through the person and process defined in the purchase agreement. An accepted exception should be written clearly; silence should not be treated as acceptance.
Remote Inspection vs. Factory Visit vs. Third-Party Inspection
Remote Evidence Review
Remote review can work for straightforward orders when the required views and tests are defined in advance. Request continuous videos for functions that cannot be proven by still images and include product identifiers in the frame. The limitation is that the buyer sees what is recorded and cannot independently select every sample or angle.
Buyer Factory Visit
A visit gives the buyer direct access to the finished order and allows immediate follow-up questions. Prepare the same checklist in advance so the visit does not become an informal showroom tour. Confirm whether all ordered units will be ready and whether packing observation is required.
Independent Third-Party Inspection
A qualified inspector can verify quantities, appearance, selected dimensions, functions, packing, and documents against the buyer's written criteria. The buyer must provide product-specific instructions; a generic consumer-electronics checklist may miss arcade-specific controls, payment, mechanical, and accessory requirements.
The appropriate method depends on order value, complexity, customization, previous supplier experience, destination risk, and contractual requirements. It can also combine remote evidence with independent sampling or a buyer visit.
Receiving Inspection Is Still Necessary
Factory approval does not replace inspection at destination. Before accepting delivery from the carrier, the receiving team should inspect the external package and record visible damage according to the carrier's procedure. Photograph the package, marks, seals where applicable, and any damage before unpacking.
After moving the machine to a safe staging area, compare the package count, inspect the machine and accessories, and follow the supplied installation and power-on instructions. Keep factory evidence and receiving evidence separate so a manufacturing issue, packing issue, or transit issue can be investigated accurately.
Frequently Asked Questions
How are arcade machines tested before shipment?+
Testing follows the selected model and approved order. It can include product identity, appearance, electrical configuration, startup, controls, displays, sound, lighting, game functions, payment interface, model-specific mechanical functions, accessories, and packing. Exact checks vary by machine type.
Can EPARK provide testing photos or videos?+
Pre-shipment photos or testing videos can be provided for confirmed orders. Buyers should define the required models, views, functions, identifiers, and approval contact in advance.
Is there a standard burn-in time for every arcade machine?+
No universal duration should be assumed. Appropriate testing depends on the machine, components, order, and agreed process. Ask the supplier to document the actual procedure used for the selected model.
Should the buyer test every machine in a large order?+
The acceptance plan should define whether each function is checked on every unit or whether a documented sampling method applies. Critical identity, quantity, customization, and packing fields may require different coverage from repeated functional checks. Agree on this before inspection.
What happens if the inspection finds a problem?+
Record the item, requirement, evidence, corrective action, owner, and status. Request re-check evidence after the action. Shipment approval or an accepted exception should follow the written purchase agreement.
Does factory inspection replace destination inspection?+
No. The buyer should also inspect the external packages and received equipment, record carrier-related damage, verify quantities and accessories, and follow model-specific installation instructions at destination.
Conclusion
A reliable arcade machine pre-shipment inspection is an order-control process, not a marketing performance. It starts with approved specifications, adapts to each machine type, records evidence, closes issues, and continues through packing identification and destination receiving.
Buyers get better results when they define acceptance criteria early and keep product, document, packing, and receiving evidence connected to the same item references. Suppliers benefit from the same clarity because the finished order can be evaluated against written requirements rather than changing expectations.